Bathroom Renovations Lockyer
We renovate bathrooms in Locker and its surrounding areas.
This particular Lockyer bathroom renovation involved more than surface updates. The existing chipboard floorboards were removed, the structural framework underneath received additional strengthening, and new compressed cement fibre boards were installed.
The shower floor was lowered to create proper drainage falls, a pivot door screen fitted with 6mm toughened glass, and skirting-height tiling installed around the room with full-height coverage in the shower area. All sanitary ware was supplied and installed as part of the project.
The Brief
The homeowner wanted a complete bathroom renovation with improved structural integrity, better shower drainage, and modern fixtures. The existing bathroom had ageing chipboard flooring that needed replacement, and the shower drainage required addressing to ensure proper water flow.
The Challenge
This project required more extensive structural work than initially apparent. This can sometimes be the case with Albany bathroom renovations due to the general age of the properties.
Once the existing chipboard floorboards were removed, the framework beneath needed additional strengthening and reinforcing before new flooring could be installed. The shower floor area required lowering to gain the correct falls back to the drain.
All pipework throughout the bathroom needed re-adjusting to accommodate new tapware positions and drainage locations. Existing wall boards around the room required partial removal to tiling height.
The work needed completing within the existing bathroom footprint whilst addressing these underlying structural issues.
Scope of Work
Demolition and Preparation
The renovation began with floor protection throughout the house’s traffic areas. All existing sanitary ware, tapware, bath, vanity, and shower were removed, followed by wall and floor tiling strip-out. The existing chipboard floorboards within the bathroom were removed, revealing the structural framework beneath. Existing wall boards around the room were partially removed to tiling height. A skip bin was placed on the driveway and remained throughout before removal upon completion.
Structural Work
The flooring framework received additional strengthening and reinforcing to ensure it could support the new bathroom properly. Compressed cement fibre floorboards were supplied and installed, providing a solid, moisture-resistant base suitable for long-term bathroom use. The shower floor area was lowered to gain the correct falls to the drain, ensuring efficient water drainage. Noggins were installed for secure mounting of the towel rail and toilet roll holder. The locations were photographed and measurements recorded for reference.
Plumbing Modifications
All pipework was re-adjusted to allow for new tapware installation in the walls and any new drainage locations. Upon completion, all plumbing was reconnected. The allocated plumber fitted all new sanitary ware with all materials included in the scope.
Wall Preparation and Niche Construction
New 6mm villa board sheets were supplied and fitted to the existing timber frame walls, then flushed and patched ready for painting. A custom shower niche measuring 600mm wide by 400mm high was built into the stud wall, providing recessed storage.
Waterproofing and Tiling
Walls and floor received proper waterproofing before tiling commenced. Standard 300x300mm white tiles were supplied and installed on walls. Standard 300x300mm light grey non-slip tiles were supplied and installed on floors. Skirting tiling was installed to approximately 300mm high around the bathroom, creating a practical splashback zone without the cost of full-height tiling throughout. The shower area received tiling up to door frame height (approximately 2.1 metres) for complete water protection. A 300mm high splashback was fitted above the basin area. New floor tiling covers the entire bathroom. Silicone sealing was applied to internal corners of tile junctions upon completion.
Fixtures and Fittings
All sanitary ware was supplied and installed as specified. The vanity cupboard, mirror, towel rail, and toilet roll holder were installed. A pivot door shower screen with 6mm toughened glass was supplied and fitted.
Electrical and Lighting
Two new downlights and a heat lamp/extractor combination unit were installed. A provisional sum covered potential complications from the existing electrical installation, as the condition and complexity can vary significantly in established homes.
Painting and Finishing
Walls, ceiling, architraves, and door all received painting, completing the fresh appearance of the room.
The Transformation
After
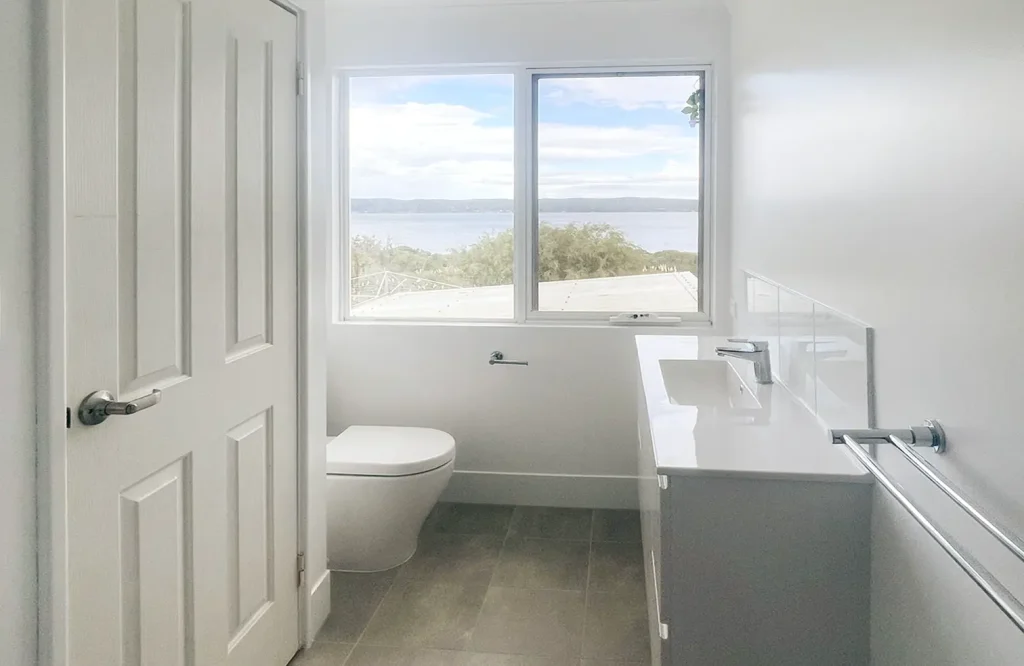
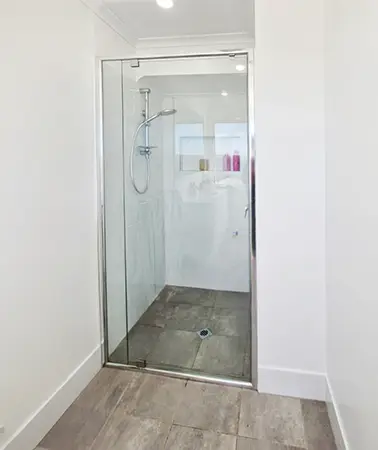
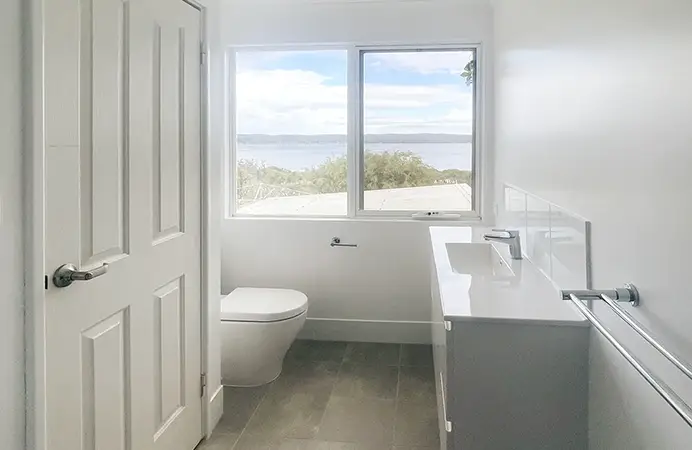
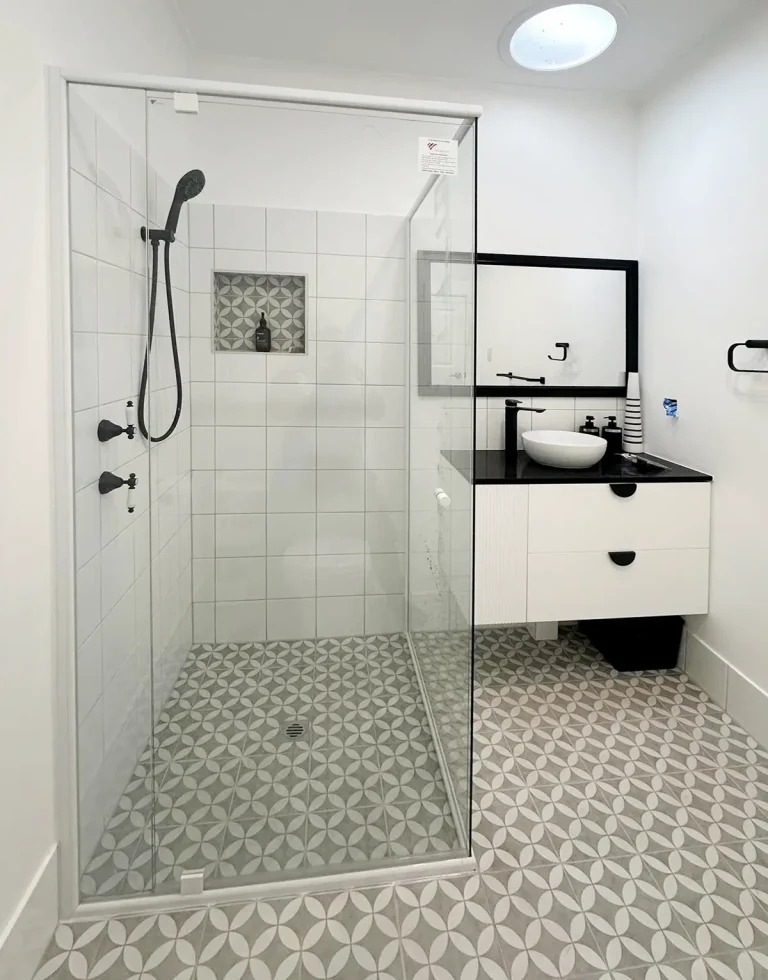
The completed bathroom features the pivot door shower screen providing easy access whilst containing water effectively. The white wall tiles and light grey non-slip floor tiles create a neutral, timeless finish. Skirting-height tiling around the room keeps costs manageable whilst providing adequate splash protection, with full-height tiling in the shower area where water exposure is highest.
The vanity, mirror, and fixtures are positioned for practical daily use. The painted walls above the skirting tiles add a finished appearance to the upper portions of the room.
Before/During Renovation
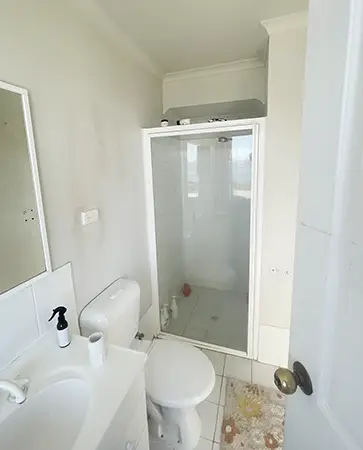
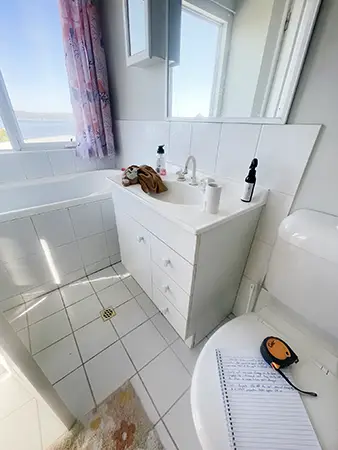

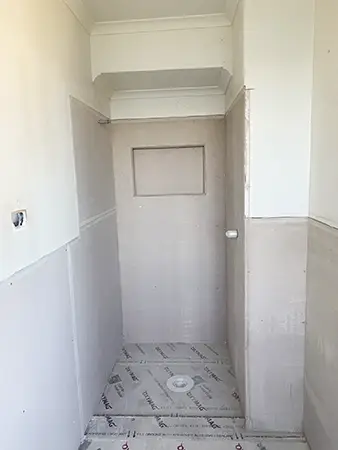
The bathroom before and during renovation, showing the dated fixtures and finishes that prompted the update. The chipboard flooring beneath the tiles would be discovered during demolition and require replacement.
Key Features
Floor Strengthening and Replacement
The existing chipboard floorboards were removed and the structural framework underneath received additional strengthening and reinforcing. New compressed cement fibre floorboards were installed, providing a solid, moisture-resistant base. This behind-the-scenes work isn’t visible in the finished bathroom, but it ensures the floor can support fixtures and regular use without issues. Compressed cement fibre performs better than chipboard in bathroom environments where moisture is present.
Lowered Shower Floor
The shower floor area was lowered to gain the correct falls back to the drain. This approach ensures water drains efficiently without pooling. Proper falls are critical to how well a shower performs long-term – inadequate drainage leads to standing water and potential issues with grout and sealing.
Skirting-Height Tiling
Tiling to approximately 300mm high around the bathroom creates a practical splashback zone without the expense of full-height tiling throughout. This approach protects walls where water contact is likely – around the basin, near the toilet, and along walkways – whilst allowing painted surfaces above to reduce material costs. The shower area receives full-height coverage (approximately 2.1 metres) for complete water protection where it’s needed most.
Pivot Door Shower Screen
The 6mm toughened glass pivot door screen provides straightforward access to the shower whilst containing water. Pivot doors swing open on hinges, offering smooth operation without the tracking systems that sliding doors require. The clean lines work well with the white and grey colour scheme.
Custom Shower Niche
Built into the stud wall at 600mm wide by 400mm high, the recessed niche provides storage for shower products without protruding into the room or requiring surface-mounted shelving. Noggins installed behind the walls ensure secure mounting points for the towel rail and toilet roll holder.
Complete Package
This project included supply and installation of all sanitary ware, distinguishing it from renovations where homeowners source their own fixtures. Standard white wall tiles and light grey non-slip floor tiles were supplied and installed, offering a straightforward approach for those who prefer not to coordinate individual material selections.
Supplied vs Owner-Sourced Materials
This project included supply of all sanitary ware and tiling, offering a simpler approach for homeowners who prefer not to source individual items. We can work either way – supplying complete packages with standard selections, or installing homeowner-supplied materials for those who want control over specific brands, styles, and finishes. The standard 300x300mm white wall tiles and light grey non-slip floor tiles used here provide a neutral, timeless result that works with various colour schemes and fixtures.
Lockyer, Albany
Lockyer is a residential suburb in Albany with a mix of older and more recent homes. The area’s established housing stock sometimes requires additional structural work during renovations, as was the case with this project where the chipboard flooring needed replacing and the framework required strengthening. This renovation updated one of Lockyer’s bathrooms with modern fixtures whilst addressing the underlying structural issues discovered during demolition.